• Why not take a moment to introduce yourself to our members?

A

Anonymous

Guest
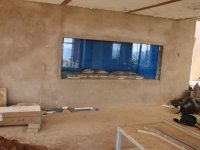
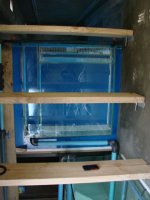
Looks like a RRPITA (Right Royal), but it'll all be worth it. It's really starting to take shape - getting easier to visualise how it'll look.

BTW, I'm always watching even if I don't always have something to say! :)
 
A

Anonymous

Guest
Doesn't look terribly large from the photo... you know what that means! MERMAID SHOT!
 
A

Anonymous

Guest
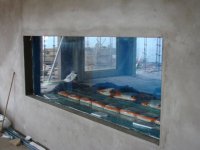
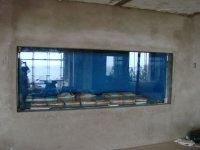
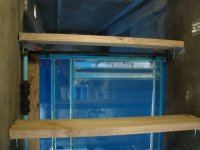
Kay, front glass is in, just some bracing left to do..... hopefully water within the week..... Mermaid shots coming, just gotta find a mermaid or two with time on their hands....
 

Attachments

  • DSC02853.jpg
    DSC02853.jpg
    35.6 KB · Views: 440
  • DSC02852.jpg
    DSC02852.jpg
    36.9 KB · Views: 441
  • DSC02850.jpg
    DSC02850.jpg
    32.9 KB · Views: 442
A

Anonymous

Guest
PS, those are 10 Kg (22 lbs) bags of sand (soon to be substrate- currently weights) in there, 200 kg in all....
 
A

Anonymous

Guest
Out of curiosity how are you going to clean the thing? Midget divers?
 
A

Anonymous

Guest
andy37":1bi08ivj said:
PS, those are 10 Kg (22 lbs) bags of sand (soon to be substrate- currently weights) in there, 200 kg in all....

They look like 500g bags of sugar! :lol:
 
A

Anonymous

Guest
I would think that the silicon would need a good 3 - 4 weeks to cure, given the sheer volume/weight of water.

Seems that I recall glasscages saying that about my 300G tank.

I'd wait to fill it if I were you. Plus, what's the rush? The house isn't ready for an operating reef yet, right?

Louey
 
A

Anonymous

Guest
sfsuphysics":1tv41beo said:
Out of curiosity how are you going to clean the thing? Midget divers?
If needs be the tank can be climbed into, however, we are working on a sling that operates from the lighting rails on rollers that will allow for access the whole length if the tank. :D
 
A

Anonymous

Guest
Louey":2u0btwql said:
I would think that the silicon would need a good 3 - 4 weeks to cure, given the sheer volume/weight of water.

Seems that I recall glasscages saying that about my 300G tank.

I'd wait to fill it if I were you. Plus, what's the rush? The house isn't ready for an operating reef yet, right?

Louey
The silicon used is rated at 99% strength after 48 hours. I will however check with the manufacturer's tech help dept today. It's not as critical as it first appears as all that glass, apart from extensive eurobracing, also has been braced and chocked to the room walls. Although it was built to be feestanding, I am taking no chances....
The rush is that I need to get the LR that is waiting to go, cured in another tank, in, to make space for more rock. Also, I need to start breaking down my current tank to move it, and it shares the same sump and return. It can't come until this one Is operational.
 
A

Anonymous

Guest
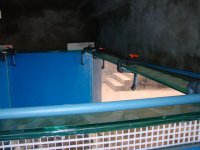
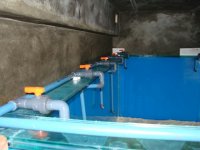
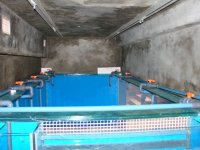
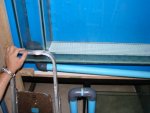
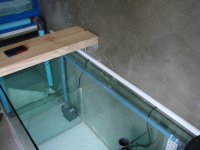
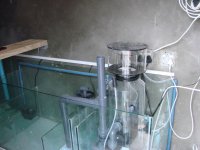
Kay, now here I need some advice..... Out here in the colonies, we do circulation with powerheads- the concept of what you guys seem to call 'closed loop' is foreign to us.... I am going 'closed loop'- or at least how I understand it, this time, as the return pump is a 22000 liter an hour pool pump (for 1400 GA of tanks and a huge sump)

For your viewing pleasure, and , I hope, some constructive criticism, is the closed loop system..... we would have filled with water this evening, but the guy with the 4 ton truck is busy until late, and we can only get water between 5 and 6pm at the local aquarium. As I have an operation scheduled tomorrow evening, the water, rock, and early life forms will be in place within 48 hours..... What do y,all think?

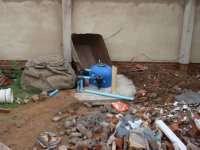
Some diverse photos also attached in the next post, including the pool pump (return) and the 400 liter LR filter for anaerobic bacteria....
 

Attachments

  • DSC02960.jpg
    DSC02960.jpg
    39.2 KB · Views: 379
  • DSC02959.jpg
    DSC02959.jpg
    38.3 KB · Views: 380
  • DSC02958.jpg
    DSC02958.jpg
    51.6 KB · Views: 380
A

Anonymous

Guest
Some generic pics....
 

Attachments

  • DSC02965.jpg
    DSC02965.jpg
    57.7 KB · Views: 376
  • DSC02963.jpg
    DSC02963.jpg
    44.5 KB · Views: 378
  • DSC02962.jpg
    DSC02962.jpg
    43.1 KB · Views: 378

bfessler

Experienced Reefer
Rating - 0%
0   0   0
That's an incredible tank. I've been following the build but this is my first post.

Looking at the returns against the front glass its not clear how much room was left between the return and the glass. Is there enough room to get a mag float through there? It appears from the photos that these returns are visible from the front glass and if so you will want an easy way to clean the algae from between the returns and the glass.

I can't wait to see the completed reef.

Burt
 

jamesw

Advanced Reefer
Rating - 0%
0   0   0
Very cool - thanks for taking the time to share and post these. I like the use of the blue piping to make it blend in to the background.

Cheers
James
 
A

Anonymous

Guest
Rating - 0%
0   0   0
bfessler":2dj4fk02 said:
That's an incredible tank. I've been following the build but this is my first post.

Looking at the returns against the front glass its not clear how much room was left between the return and the glass. Is there enough room to get a mag float through there? It appears from the photos that these returns are visible from the front glass and if so you will want an easy way to clean the algae from between the returns and the glass.

I can't wait to see the completed reef.

Burt

Thanks Burt, its something I picked up yesterday. The entire frame (s) will be clad in cherrywood framing when the actual water level has settled (Water within the next 12 hours, rock is already on site) I will cut those front returns back to make sure they are not obstructing the view and in the way of the magnet. I have more pics and will post them in the next day or so- the RODI- an old one that was 'refurbished to accommodate a TDS meter, pre and post the new integrated calcium chamber 8) , is now plumbed and in, and some removeable steps are being fitted this morning- when I get to site. All the plumbing is working now, and the electrical work is now done- except the electrician wired it all wrong and will have to come back and fix his temp repairs properly later.
 
A

Anonymous

Guest
Rating - 0%
0   0   0
jamesw":g50ihr20 said:
Very cool - thanks for taking the time to share and post these. I like the use of the blue piping to make it blend in to the background.

Cheers
James

Thanks James, out here in the colonies, that blue pipe is our high pressure PVC, its co-ordination from a colour pov was purely accidental.

PS I just realised that I havent posted pics of the completed sump- skimmer plumbed, zeolith reactor plumbed, etc etc- will do later when I have finished pumping water...... loads of pics to come.....
 
A

Anonymous

Guest
Rating - 0%
0   0   0
Am I seeing this correctly? You only have access to the tank from the one end?

Louey
 
A

Anonymous

Guest
Rating - 0%
0   0   0
Louey":3bcmem5x said:
Am I seeing this correctly? You only have access to the tank from the one end?

Louey

Thats correct, and from above, lying in a sling on runners in the lighting rail. Any major work will require climbing into the tank if needs be.
 
A

Anonymous

Guest
Rating - 0%
0   0   0
Also first few pics on the 27th show what looks like your return lines? A few of them are awfully low in the tank, which translates to the water siphoning out to that level should there be a power outage... do you have siphon breaks? or an incredibly large reservior to catch all that water? :D
 
A

Anonymous

Guest
Rating - 0%
0   0   0
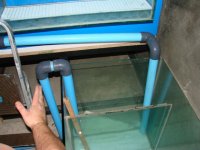
I also saw that, and catered for it. The pic attached shows the two in line non-return valves I fitted- they are the two grey fittings on the 32mm pipe on the left of the photo. The reason why there are two is purely as a backup, I dont want that water back-syphoning.....

PS, after 5 hours and 50000 liters, we have water....!!! Pics to follow shortly....(no leaks and the skimmer and pool pump are working fine!) (No cracked glass either! :D )
 

Attachments

  • DSC03073.jpg
    DSC03073.jpg
    38 KB · Views: 269
A

Anonymous

Guest
Rating - 0%
0   0   0
Some from today, the removable stairs we built to allow easy access, the conduiting for the cabling etc etc.....
 

Attachments

  • DSC03078.jpg
    DSC03078.jpg
    35 KB · Views: 537
  • DSC03076.jpg
    DSC03076.jpg
    42.5 KB · Views: 540
  • DSC03074.jpg
    DSC03074.jpg
    40.9 KB · Views: 540

Sponsor Reefs

We're a FREE website, and we exist because of hobbyists like YOU who help us run this community.

Click here to sponsor $10:


Top