• Why not take a moment to introduce yourself to our members?

masterswimmer

Old School Reefer
Vendor
Location
NY
Rating - 99.6%
450   2   0
The rubble will be both submerged and out of the water but will be wet at all times there for no cycle.


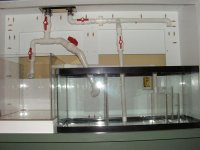
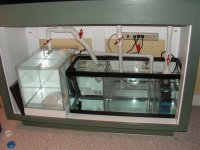
Based on the pictures you've posted, the water flows out of the eggcrate chamber on the bottom. That is the indicator it's a drip system. The exposed LR is no different than using bioballs. Your claim to 'no cycle' is based on what? I'm just suggesting you rethink that part of your plumbing. My belief is you're going to experience almost continuous cycling from the exposed rock.

swimmer
 

Dj Orion

Advanced Reefer
Location
Suffolk 11772
Rating - 100%
25   0   0
Based on the pictures you've posted, the water flows out of the eggcrate chamber on the bottom. That is the indicator it's a drip system. The exposed LR is no different than using bioballs. Your claim to 'no cycle' is based on what? I'm just suggesting you rethink that part of your plumbing. My belief is you're going to experience almost continuous cycling from the exposed rock.

swimmer


I completely agree. I would use that space as another fuge, or RSB (remote sand bed) since you have allready invested it as real estate in your system. The trickel down system is mainly effective for a Fish only system, where nitrates reaching 50 ppm will be tolerated by the fish. If you do find that later on you have a problem, it will be a long and slow process of removing the live rock / bio balls from the trickel down, in order to keep from recycling. And that will in turn keep your tank from having the desired low nitrate levels for a long period of time. It seems that you have invested alot of time and pre planning for your sump, it would suck if you would have to go back and start messing with it once it was running (been there myself)
 

NYreefNoob

Skimmer Freak
Location
poughquag, ny
Rating - 99.4%
168   1   0
agreed with the rest , as well as you dont need the lr in the sump. if anything put sand in the fuge with algea and some lr. you kinda have it set-up like mine is other than the drip plate. i just use a filter sock. looks good so far, and as other's have said much easier to do it now then the inevitable of doing it later.
 

WoodRight

Active Reefer
Location
Watertown,CT
Rating - 0%
0   0   0
You guys got me thinking of changing the wet dry thing but would I have to change the drip tray also or can I leave that and just take out the egg create. I can then just put sand in that space. I was planning on putting the heaters under the egg create.

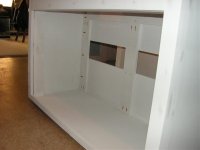
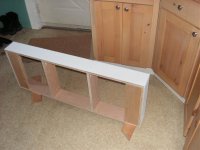
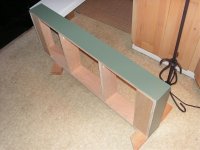
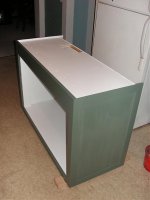
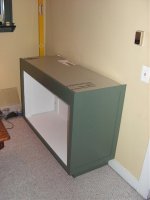
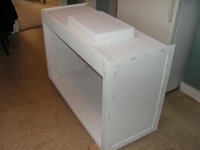
Well I have some pictures of the setup in place and painted. I thought it was ready to go but I guess not. It's funny because the other site that I'm on no one said anything about this wet/dry thing.
 

Attachments

  • Cabinet 005.jpg
    Cabinet 005.jpg
    49.5 KB · Views: 221
  • Cabinet 006.jpg
    Cabinet 006.jpg
    75.3 KB · Views: 222
  • Cabinet 007.jpg
    Cabinet 007.jpg
    88.1 KB · Views: 220
  • Cabinet 008.jpg
    Cabinet 008.jpg
    40.3 KB · Views: 220
  • Cabinet 009.jpg
    Cabinet 009.jpg
    40.9 KB · Views: 220
  • Cabinet 004.jpg
    Cabinet 004.jpg
    63.1 KB · Views: 218
  • Cabinet 017.jpg
    Cabinet 017.jpg
    82.1 KB · Views: 220
  • Cabinet 018.jpg
    Cabinet 018.jpg
    77.9 KB · Views: 223
  • Cabinet 014.jpg
    Cabinet 014.jpg
    47.5 KB · Views: 222
  • Cabinet 013.jpg
    Cabinet 013.jpg
    31 KB · Views: 220
  • Cabinet 010.jpg
    Cabinet 010.jpg
    43.1 KB · Views: 220

autoponicz

powered by MR
Location
Westbury L.i
Rating - 100%
58   0   0
i nice setup so far....

but like all the others say....erase the trickle filter idea.....i would just remove the top plate and egg crate and fit a nice skimmer in that spot....and use the smaller section for a phosban reactor and a carbon reactor....
 

latino277

Advanced Reefer
Location
Long Island
Rating - 100%
19   0   0
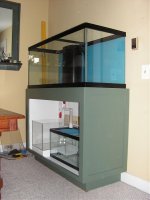
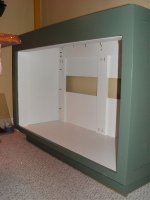
1st off... Nice color for the stand.. very nice wood work.

2nd... I would take out the drip tray and egg creat and use that area for a nice skimmer and reators. the second area is were I would put the LR rubble. This way you have your add filtration and it help trap some of those bubbles... all in all... good build. Good luck
 

Awibrandy

Old School Reefer
Location
Far Rockaway
Rating - 100%
182   0   0
Welcome to MR! Very nice set up your working on! I have two questions for you.
1) Are you putting doors on the stand?
2) Are you setting up your tank next to the house thermostat?

I ask this because you may end up with the same problem I had in my old house. We had no choice but to place the tank next a thermostat, and we had problems with the heat from the lamps tricking the thermostat into regestering higher temp then what it actually was in the house. We had to adjust the thermostat at a much higher temp so that we would actually get heat.;)
Best wishes for a successful tank.:)
 

firehazard

firehazard
Location
baldwin
Rating - 100%
5   0   0
i still dont understand if the drain goes to the fuge and to the "'trickle", and the fuge drains to the bubble trap, then why is the return( to the main tank) T'd to go back in the middle of the sump/ wetdry...
 

Dace

Advanced Reefer
Location
Manhattan
Rating - 99.7%
393   1   0
First of all i want you to know that you do great work, if all your ideas before the tank start would have been correct, referring to the trickle tray, this would have been error proof, Don't know what you do for a living, but if it's not carpentry, you are the man, and even if it is, your still the man. The stand looks extremely nice. can't wait to see this setup running. Sorry i just went through the pics and thread quick, did you list all of your equipment that you will be using on this setup
 

KathyC

Moderator
Location
Barnum Island
Rating - 100%
200   0   0
Beautiful woodworking and the color you've chosen is very nice!!
I'm curious about the doors too and agree with everyone else regarding the trickle portion being problematic.

Will you also be making a matching canopy?

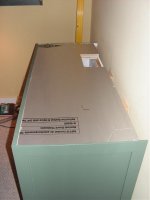
I see just the one receptacle behind the tank..will all of your electricity be running from there?
I'd suggest you get one of those outdoor hinge type plastic covers over it before you finalize set up as you're certain to get some salt spray in that area with it being so low on the wall.

Best of luck with your new system, looking forward to more pics!! :)
 

Dj Orion

Advanced Reefer
Location
Suffolk 11772
Rating - 100%
25   0   0
i still dont understand if the drain goes to the fuge and to the "'trickle", and the fuge drains to the bubble trap, then why is the return( to the main tank) T'd to go back in the middle of the sump/ wetdry...

the purpose for a T on the return to the tank is to reduce pressure on the pump created by the ball valve. If there is a T with a return back to the sump, it will reduce the amount of strain put on the pump, and give a much longer lifespan to the pump. There is a full article and explanation on melevsreef.com
 

WoodRight

Active Reefer
Location
Watertown,CT
Rating - 0%
0   0   0
OK ever one I have to say I appreciate all the feed back to me tread. there seem to be allot of questions about my setup. so here are some answers. I think I'm going to change the wet/dry into a sump before filling it so everyone can relax. as far as doors I'm going to make a panel that can be removed instead of doors because the doors will get in the way of daily work on the tank. The tank is very close to our dinning table. As far as the heat goes I'm gonna have to deal with that when it comes up. For the canopy I'm not sure yet I have to see what lights we get for the tank, if they are cool looking I might not but then again I might. Oh and yes I am i carpenter. I build cabinets for a living.
 
Last edited:

WoodRight

Active Reefer
Location
Watertown,CT
Rating - 0%
0   0   0
I changed it again!

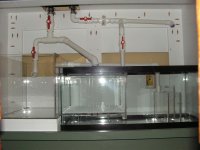
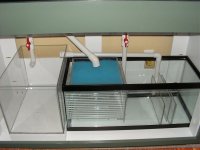
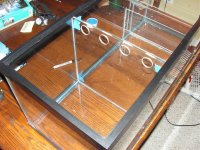
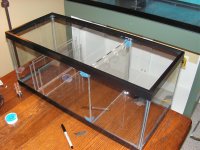
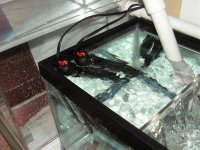
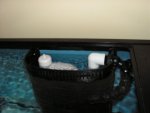
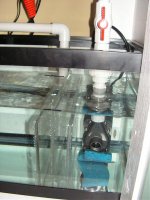
Well you guy won I changed it for the second time and wet/dry no more. I also got the pump and heaters today so I was finely able to do a tap water with vinegar test tonight. It works like a dream. I have some new pics for you guys. I'm sure you will let me know what you think. I have a few very easy and very small things to tweak but all and all I'm very happy. Enjoy the pictures.
 

Attachments

  • Sump 005.jpg
    Sump 005.jpg
    97.4 KB · Views: 213
  • Sump 001.jpg
    Sump 001.jpg
    170.4 KB · Views: 209
  • Sump 004.jpg
    Sump 004.jpg
    130.2 KB · Views: 210
  • Sump 006.jpg
    Sump 006.jpg
    78.1 KB · Views: 211
  • Tank Test 001.jpg
    Tank Test 001.jpg
    106.2 KB · Views: 212
  • Tank Test 002.jpg
    Tank Test 002.jpg
    133.2 KB · Views: 210
  • Tank Test 003.jpg
    Tank Test 003.jpg
    55.9 KB · Views: 208
  • Tank Test 004.jpg
    Tank Test 004.jpg
    64.4 KB · Views: 205

Vic8361

Senior Member
Rating - 100%
142   0   0
woodright the set up looks awesome great job. Make sure you test it for a power outage to see if you sump could handle the water from the tank without it overflowing the sump.
There dosen't seem to be too much room in the sump for the added water.
pull the plug on the return pump and check.
Vic
 

latino277

Advanced Reefer
Location
Long Island
Rating - 100%
19   0   0
Very nice Job. I hope my new build comes out as clean as this. And as stated above. test for power outage by turning off the whole system and see what happens.
 

WoodRight

Active Reefer
Location
Watertown,CT
Rating - 0%
0   0   0
woodright the set up looks awesome great job. Make sure you test it for a power outage to see if you sump could handle the water from the tank without it overflowing the sump.
There dosen't seem to be too much room in the sump for the added water.
pull the plug on the return pump and check.
Vic

Thanks, If you notice in the picture above your post there are two black sharpie marks on the sump. Those are the fill marks. The lower one is the fill line when the pump is running and the higher one is when the pump is off, But thank you anyway.
 

russianmd

Advanced Reefer
Location
Brooklyn
Rating - 100%
18   0   0
Woodright, props for beautiful carpentry!

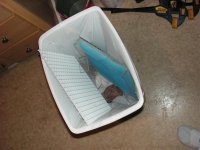
And quite a few people will breathe with relief when they see that eggcrate in the trashcan!

Looking forward to your tank flourishing. Welcome to MR.
 

Sponsor Reefs

We're a FREE website, and we exist because of hobbyists like YOU who help us run this community.

Click here to sponsor $10:


Top