• Why not take a moment to introduce yourself to our members?

RotaryReef

Experienced Reefer
Location
Long Island
Rating - 100%
9   0   0
Hey Manhattan Reefs community! I am a member of Nano-Reef.com and came across this site from other members. I figured I would make a build thread here as well!

Tank first got wet on Oct 22, 2016.

Build Notes:
Coralife Biocube 14G
inTank Media Basket (Filter Floss, Purigen, Chemi-Pure Elite)
Upgraded MJ900 Pump (Cobalt)
Vortech MP10 wes QD
NanoBox Tide Plus M
50W Heater
2 Thermometers

Tools:
Salinity Refractometer
Turkey Baster

Live Stock:
Approx. 10lbs of Live Rock
10lbs of Live Sand

Maine Mocha Clownfish
Ocellaris Clownfish
5 Dwarf Ceriths
2 Nassarius
3 Florida Ceriths
3 Antillean Nerites

Unknown Zoa
GSP
Frogspwan

I will need to take a current pic on upload!
 

RotaryReef

Experienced Reefer
Location
Long Island
Rating - 100%
9   0   0
Update #1

Nano Box Retrofit


So i was able to install the Nano Box Tide Plus M that I received from Dave. I am well aware that he makes an actually Retro Kit solution, but I wanted to be able to use my LED lighting in the future if I decided to go hood-less or with a different tank. If anyone is curious, this is how I went about installing it:

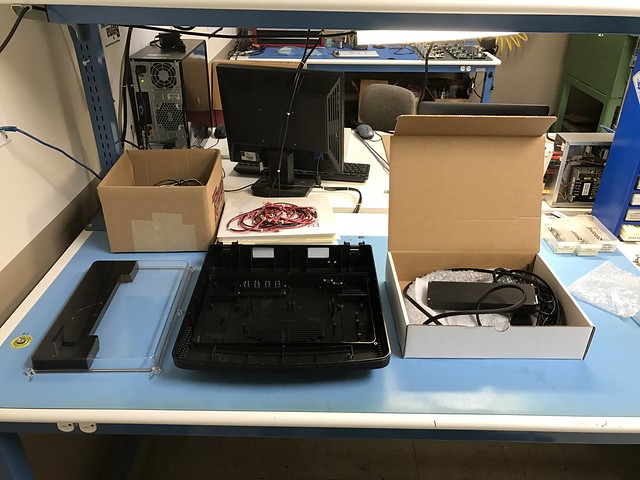
Step 1: I gutted the BioCube hood of all stock equipment. Dave was kind enough to send me my Tide without the gooseneck attached, so that was one less thing to disassemble!

https://flic.kr/p/QFmMVxhttps://www.flickr.com/photos/145763750@N07/

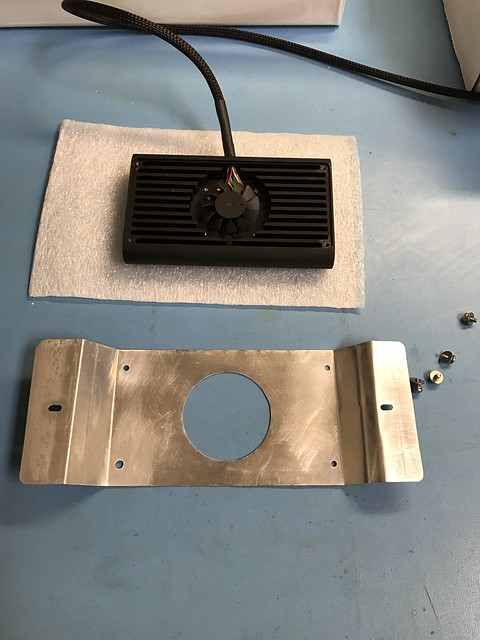
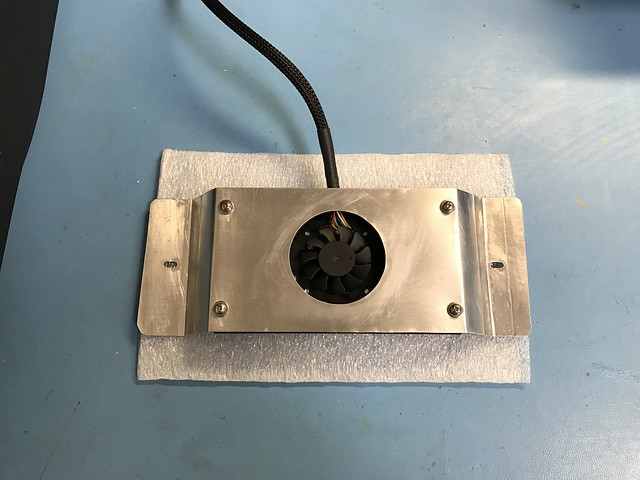
Step 2: Being a mechanical engineer it would be frown'd upon if I took the easy route of mounting the Tide by using Velcro or Double-Backed Tape. :angry: I wanted a more secure mounting solution so that the Tide would always remain in a set position when I open and close my hood. I also didn't want to modify my BioCube hood by drilling holes or cutting standoffs like I've seen done on other LED options for this hood. Instead I fabricated a mounting bracket out of spare sheet metal I had lying around. I drilled 4 clearance holes to mount to the Nan Box, 2 clearance holes to mount to the BioCube standoffs, and I opened up a 2" diameter hole for the fan to be able to blow out the BioCube hood vent.

https://flic.kr/p/QCMEFGhttps://www.flickr.com/photos/145763750@N07/

https://flic.kr/p/QCMEAwhttps://www.flickr.com/photos/145763750@N07/

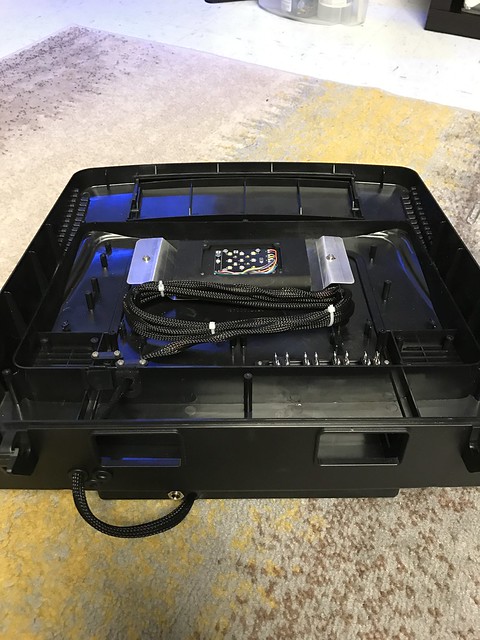
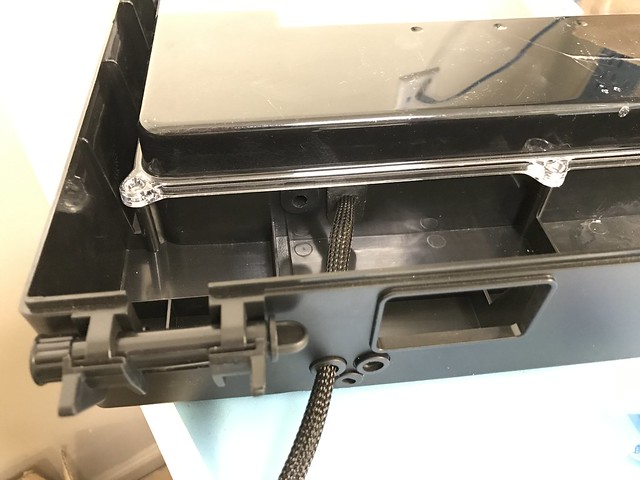
Step 3: I marked a center-line on my bracket and on the BioCube hood. The lens and top cover on the Nano Box where then removed and set aside. The Nano Box was then mounted to my bracket and then the bracket to my hood. Now was clean up time. I ended up opening up the drivers box of the NanoCube so I could loosen a few wires so I could pass the wires and the fiberglass sleeving through the grommets of the BioCube. I then reattached the wires and closed up the drivers box. I wrapped the fiberglass sleeving around 2 standoffs in the BioCube and bundled the wires together with zip-ties. I closed up the BioCube at this point with the stock BioCube lens. The driver box is currently sitting on the top outside of the BioCube hood since I'm not too familiar with the unit yet. I wasn't sure how often I would have to blink up and wanted to be able to see what trouble codes I was receiving.

https://flic.kr/p/QCMEtC https://www.flickr.com/photos/145763750@N07/

https://flic.kr/p/QCME37https://www.flickr.com/photos/145763750@N07/

https://flic.kr/p/QFmMJRhttps://www.flickr.com/photos/145763750@N07/

Step 4: Install a Nano Box sticker on the hood of my BioCube!

https://flic.kr/p/QCMDN9https://www.flickr.com/photos/145763750@N07/

Disclaimer: This is not a DIY but just how I went about in installing LED's to a BioCube.
 

Sponsor Reefs

We're a FREE website, and we exist because of hobbyists like YOU who help us run this community.

Click here to sponsor $10:


Top