• Why not take a moment to introduce yourself to our members?

A

Anonymous

Guest
The mission: 5.5AGA w/ 2.5AGA sump:

For some strange reason, the DIY bug bit me. I want to make this setup just as a learning excercise. I know it's not going to be perfect, so that's why I'm chronicle my little adventure here. All you experienced DIY'ers, feel free to tell me how crappy my plan or workmanship is :)

I'll keep updating this thread as I progress, so like, check back or something. Unless you think I suck, and this sucks. Then just ignore me.

So far, this is what I have:
• 5.5g AGA display tank w/ drilled overflow
• 2.5g AGA sump tank w/ fuge area
• DIY protein skimmer (Matt_Wendell's design)
• Display and fuge lit by PC's (MH is overkill, no?)
• Kalk doser?
• Auto top off?
• What am I forgetting?

The Planz:
First is the plumbing setup. It's a work in progress, so it's not complete yet. Both links go to the same thing, but some have trouble with the .swf (It's easy for me to work in flash, so i made it in there)
http://www.website-x.com/fish/plumbing.swf
http://www.website-x.com/fish/plumbing.gif - for non flashy types

The Sumpy:
Below is my sump. It's made from Plexi I got from Home Depot. It was thin enough I could score it with a strong utility knife and snap it to fit. It's got holes drilled in certain bulkheads to allow water to pass unrestricted (15 half-inch holes). The rear right is the water return, I'm going to pile rubble rock in there. Then, at the right front, is the DIY skimmer spot. Then the middle is the fuge. Then the left is the sump pump. Pretty simple. No room for baffles.
sump001.jpg


So, what'cha think? Feedback is not only welcome, but solicited.
-me
 
A

Anonymous

Guest
Matt- to answer your questions from the other thread:

Hiya matt. Hope you're having fun!

How are you goig to build that little trapezoidal overflow dealie?
It's going to be of similar construction to the sump ... just thin acrylic sheets scored and snapped to fit, then siliconed. I'm going to drill a hole in the bottom and put a bulkhead fitting there. The price of large bore glass drill bits scares the bajeezus out of me, though.

Also, why do your returns have strainers on them?
Because I haven't yet found where to purchase nozzles that screw on the threaded bulkhead fitting. I'd like to find some that I can point inwards, not just straight forward. I know nothing of reef plumbing. I couldn't even find a site that sold them. Perhaps because I don't know the right thing to search for. I kept finding metal ones and other nozzles meant for large systems or high pressure setups. I had the nozzle widget already made n flash, so I just put it in there for now. I don't plan to use the strainer there.

Is the tee in the plumbing going to be a SCWD?
I wasn't planning on it. I think that might not be the best for a small tank, no? Also, I don't know how the SCWD works. If it involves turning a pump or other gadget on and off, I'll not use it. If it has a rotating screw mechanism inside the chamber which is activated by water pressure, I might use it.

How do you plan on having the drain enter the sump?
The tube descending from the display will eventually terminate in a bulkhead fitting which has been screwed into a corresponding hole in a little square of lexan which will cap off that section of the bulkhead.
 

tazdevil

Experienced Reefer
Rating - 0%
0   0   0
Nice looking, but you still need help. Call 1-800-900-RAAN (reef addicts anonymous) for an immediate referral. :lol:
 
A

Anonymous

Guest
Rating - 0%
0   0   0
OK, take all this as constructive criticism...

The sump is a good design. The only problem I can see is that that thin acrylic might not hold the water pressure. If there's a large difference in water level between the fuge and left side of the sump, it could bend the acrylic and eventually rip off the silicone. Easy way to fix this is to just keep the water level on the left side high, maybe only a 1/2" less than the fuge, if it can hold it.

I really think you should use a table saw to cut your acrylic for the overflow. It will look much more professional, and you'll have a much better chance of it NOT leaking. A LHS should be able to cut it for you. The trapezoid shape is also going to be very hard to make by siliconing pieces together...typically overflows shaped like that are one solid piece of acrylic that has been bent to make the angle. You can do this by heating the plastic (Maybe boiling water in a large pot?). It's very important that the overflow doesn't leak, at least the way you've designed it. If the bulkhead is at the bottom of the tank, theoretically you could have the entire tank drain to the sump in a very long power outage if your overflow leaks, EVEN THOUGH you have that standpipe dealie in there.

I'll respond more later, gotta go gamble!
 

Juck

Advanced Reefer
Rating - 0%
0   0   0
I was worried about water pressure from the fuge area on my 30g aga sump when I divided it up.

I cut some small pieces of glass and siliconed them flat on the glass on either side of the partitions,, pressed up against them as a brace. They ain't going anywhere.

I read that last sentence 20 times and it still doesn't make sense.
 
A

Anonymous

Guest
Rating - 0%
0   0   0
http://www.modularhose.com/

Other online places sell this stuff too. They have adapters that screw into bulkheads.

The SCWD works on water pressure. It seems to be pretty reliable. I think they're like $30 or so, www.premiumaquatics.com carries them IIRC.

The way your plumbing enters the sump is very important. Basically you want to have it right at the water surface, but not submerged and not too far above it. Otherwise you get loud noise and/or salt spray=salt creep. Covering it with a lid will help, especially if you can silicone that lid to the surrounding plexi to make a watertight seal.

If I was building that overflow I would drill the hole in the back glass, not the bottom, and make a smaller overflow box to save space. There's no chance of draining your whole tank onto the floor that way.
 
A

Anonymous

Guest
Rating - 0%
0   0   0
Don't worry Matt, as lons as ppl are polite in their phrasing, it's all good in the hood. I posted this stuff here so I can take advantage of other reefers knowledge, which includes pointing out my noob errors.

The only problem I can see is that that thin acrylic might not hold the water pressure.
I thought about that too, but wasn't too worried. After all, it's only a 2.5g tank, there isn't that much pressure. Anyhow, I did fill it and test, and that bulkhead is definitely going to hold.

Easy way to fix this is to just keep the water level on the left side high, maybe only a 1/2" less than the fuge, if it can hold it.
Hmm Ok, I'll keep that in mind, but I had wanted to do the thing where I calculate how much will drain from the display and then the sump has *exactly* enough room to fit that water.

I really think you should use a table saw to cut your acrylic for the overflow.
Yeah so do I. Wanna buy me one, then find a shop or garage that I can use? Apartment life sucks sometimes, even if I do appreciate the lack of house responsibilities. And really, the edges looked just fine when snapped, but the problem was the silicone. That stuff is messy and whatnot.

A LHS should be able to cut it for you.
What's LHS?

The trapezoid shape is also going to be very hard to make by siliconing pieces together...typically overflows shaped like that are one solid piece of acrylic that has been bent to make the angle. You can do this by heating the plastic (Maybe boiling water in a large pot?). It's very important that the overflow doesn't leak, at least the way you've designed it. If the bulkhead is at the bottom of the tank, theoretically you could have the entire tank drain to the sump in a very long power outage if your overflow leaks, EVEN THOUGH you have that standpipe dealie in there.
Hmm ... really? It seems pretty simple to me. I was going to use 4 pegs to space out the front of the overflow. Then I was simply going to cut two even strips of acrylic and glue them to the edges. Voila!

Also ... that does make sense about it being one peice. I wish I had a toaster. I used to work at a plexi factory, actually, as a temp ... for about 4 months during a summer in high school. We had this giant toaster and we'd throw entire 4'x4' sheets in there to get all melty for vacuum forming. It was pretty sweet. If they didn't hate me, I'd go back there and ask to use the tools.

About the standpipe and bulkhead ... I modeled mine after the only diagram I was able to dig up online ... and I can't find it anymore, lol. Do you have perhaps a link to a diagram of a proper overflow? I'd like to guard against draining the entire tank. I'd like to view a diagram (i know it may not exist though) because while I understand the problems you've outlined, I don't quite know how to redesign the overflow so that's not a problem.

And, in fact, now that I'm thinking about it ... the overflow AND the bulkhead would have to leak at the same time to allow the entire tank water to drain. That's unlikely, but I guess worth guarding against, because of the severity of the problem.

Lastly ... I could redo where the overflow is. I had thought about making it at a 45degree angle in each corner, so then I could use only one sheet of plexi for each overflow. Problem with that is what do I do with the returns then? I suppose I could put them in the middle and have them point to the edges. Then my low current spot would be in the front center. Also I think that the shape of the space in each corner isn't the most efficient, so I would have to sacrifice more tank space if I had the returns in each corner.

Thanks for all your advice and links, Matt! Have fun gamblin'!!!
-B
 

ricky1414

Advanced Reefer
Rating - 0%
0   0   0
Matt_Wandell":snhny4w4 said:
The trapezoid shape is also going to be very hard to make by siliconing pieces together...
What exactly is a trapezoidal shape? :wink:

Matt_Wandell":snhny4w4 said:
I'll respond more later, gotta go gamble!
I'll be there in a few weeks for Memorial Day. Nothing better than spending 400 bucks on a hotel room! :x Hope your having fun... CHA-CHING!! 8)
 
A

Anonymous

Guest
Rating - 0%
0   0   0
A trapezoid is a quadrilateral with one pair of parallel sides. Check out the plumbing plan gif and look at the top view of the overflow shape.
 
A

Anonymous

Guest
Rating - 0%
0   0   0
For the standpipe...
http://www.rl180reef.com/frames.htm

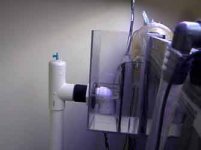
Click on "Durso Standpipe" for more info. I've attached a pic of what I would do with your size tank. The white elbow would go inside the tank, and the rest hangs out the back. You could put this in the center, and then build a little rectangular or trapezoidal box around it in the tank. Cool part about this design is it takes up far less space inside the tank--it only needs to cover the elbow, not go from top to bottom of the tank.

LHS = Local Hardware Store. An ACE will cut it for free. You might want to check out www.tapplastics.com for a store near you as well. They'll have black and blue acrylic.
 

Attachments

  • external.jpg
    external.jpg
    4.7 KB · Views: 956

Sponsor Reefs

We're a FREE website, and we exist because of hobbyists like YOU who help us run this community.

Click here to sponsor $10:


Top